Working With The Control Panel
The Device Manager Control Panel for subscribers is a browser-based application that helps the end user to manage, protect and share their home network. It enables the subscriber to easily modify basic home network configuration such as wireless, firewall, and port forwarding, and provides a means to setup future enhanced. The Control Panel provides remote access to the home network, providing a one-select process to access any IP-enabled device in the home.
In addition to subscribers accessing the Control Panel through a website on their own, there might be times when a CSR or a home technician finds it useful to access the Control Panel through the Device Manager GUI interface and make changes.
Security and Logging In
As the provider, you can choose to enable Control Panel access for the Subscriber or not and also establish initial login credentials. Upon logging into the Control Panel for the first time, the subscriber is prompted to choose a new password. It is best to select something easy for the subscriber to remember yet difficult for others to guess.
As of v10.0.1.0, Device Manager is now configurable for a maximum number of failed Control Panel login attempts. The default is set at a max of 5 attempts but this is alterable in the system global settings via, “MaxFailedCPLoginAttempts”.
When the max number of attempts is exceeded, the string found at “CPLockoutMessage” will be displayed on screen. The message should instruct the subscriber to contact their service provider to unlock the account.
Inquire of your Sales Engineer or contact Adtran Support to customize parameters mentioned above and others related to Control Panel security if required.
Freeing a locked Control Panel Account
In the left navigation bar of the Device Manager CSR portal, select Subscriber Information and note the status of the checkbox labeled, "Login locked out" in the section related to the Control Panel. The checkbox will show as checked when MaxFailedCPLoginAttempts is exceeded. Unlock the subscriber’s account by un-checking this checkbox.
Managing Multi-Site Subscribers
When the subscriber has multiple locations and thus multiple gateway devices provisioned to their Subscriber record in Device Manager, the login sequence presents this screen (below) with a drop-down menu listing each locations. Select the gateway to manage during this Control Panel session from the drop-down list then select the OK button immediately beneath the drop-down.
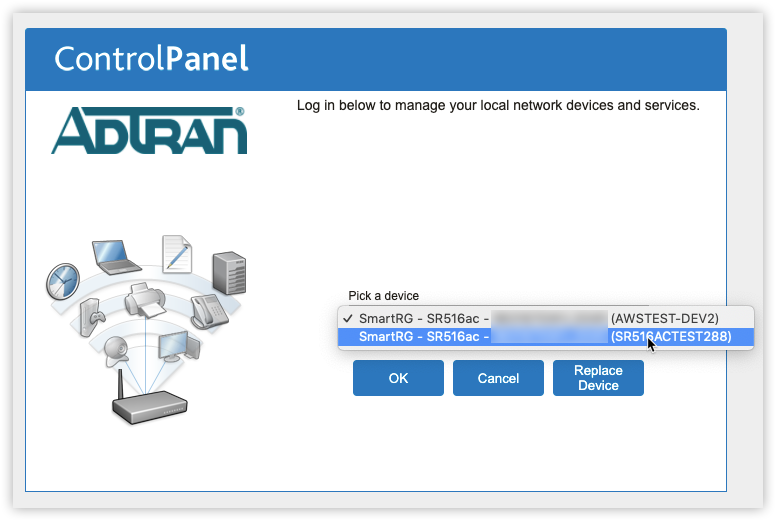
Subscribers with single sites are not required to make this selection and instead are presented with the main, Control Panel landing page for their gateway upon successful login.
Control Panel Features
The following options are available:
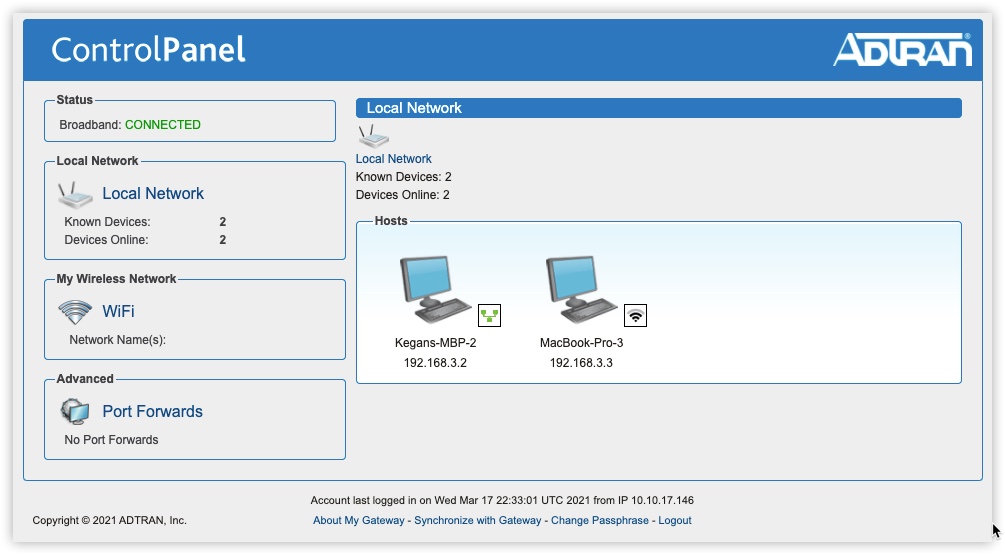
- Network Status: Shows whether broadband is connected and whether wireless networking is enabled.
- Wireless Settings: Here you can enable or disable wireless, or modify wireless settings, such as changing the WEP Key, changing the wireless broadcast channel, and enabling/disabling the broadcast of the subscriber’s SSID. Refer to Managing Wireless Settings for full configuration details.
- Local Network: This shows how many LAN devices are known to the local network, and how many are online. When you log in, the complete list of devices connected to the network is automatically displayed on the right-hand side of the screen.
- Port Forward: You can manage port forwarding configuration from here. Refer to Managing Port Forwarding for full configuration details.
Viewing Device Information
Hovering over a device with your mouse will display a small window providing more information about applied services. selecting on the device icon or name will load the Device Detail page for that device.
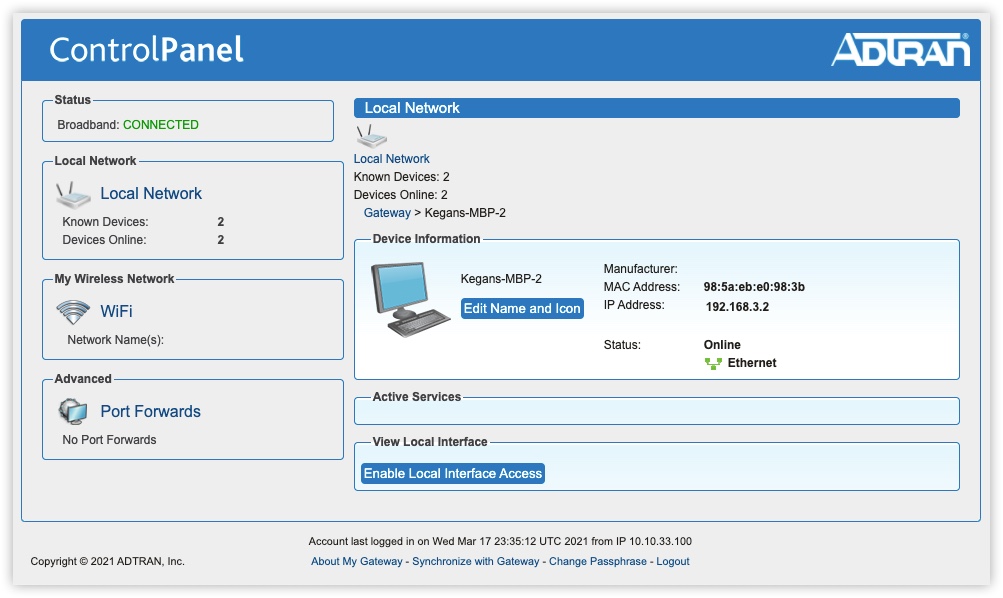
To change a name or icon for a particular device:
- Select on the required device.
- Select Edit Name and Icon.
- Type in the name of your choosing and if required, choose a different icon.
- Select OK and then select Save.
Enabling Local Interface Access for LAN Client devices
Some devices, such as webcams have a local management interface that you can access as a web page. This management interface might allow you to schedule events or view camera pictures. This cannot be enabled via the subscriber Control Panel but rather, the CSR Portal. If you wish your subscriber to have this capability, perform the following steps.
- From the Customer Support tab, search for the subscriber for whom this feature is to be enabled and open their subscriber record.
- In the Local Network window, select Enable in the Local Interface column for the LAN device in question.

- If applicable, enter the port number or path then select OK.
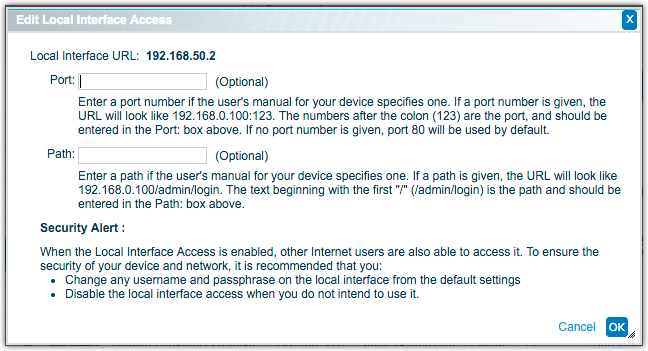
- Save the changes to see the new link.
- To disable local interface access, select Disable in the Local Interface column.