Managing the Local Network
The Local Network window displays information about any LAN devices attached to the subscriber’s CPE device. The LAN devices might be physically attached, or if wireless networking is enabled, might be communicating wirelessly with the gateway.
You can view link throughput and the number of known LAN devices and actual devices online. You can also assign icons to devices and name them, and delete disconnected devices from the LAN.
Some local network devices (such as webcams) might have a local interface web service that lets you manage the device configuration. Device Manager can be used to set up a link to this interface that appears in the subscriber's control panel. It also sets up a port forward that allows the interface to be accessed from the Internet.
If a device supports a local interface, its manual provides information on the port or path required to access the local interface. The device must be online to configure this link.
Viewing Local Network Status
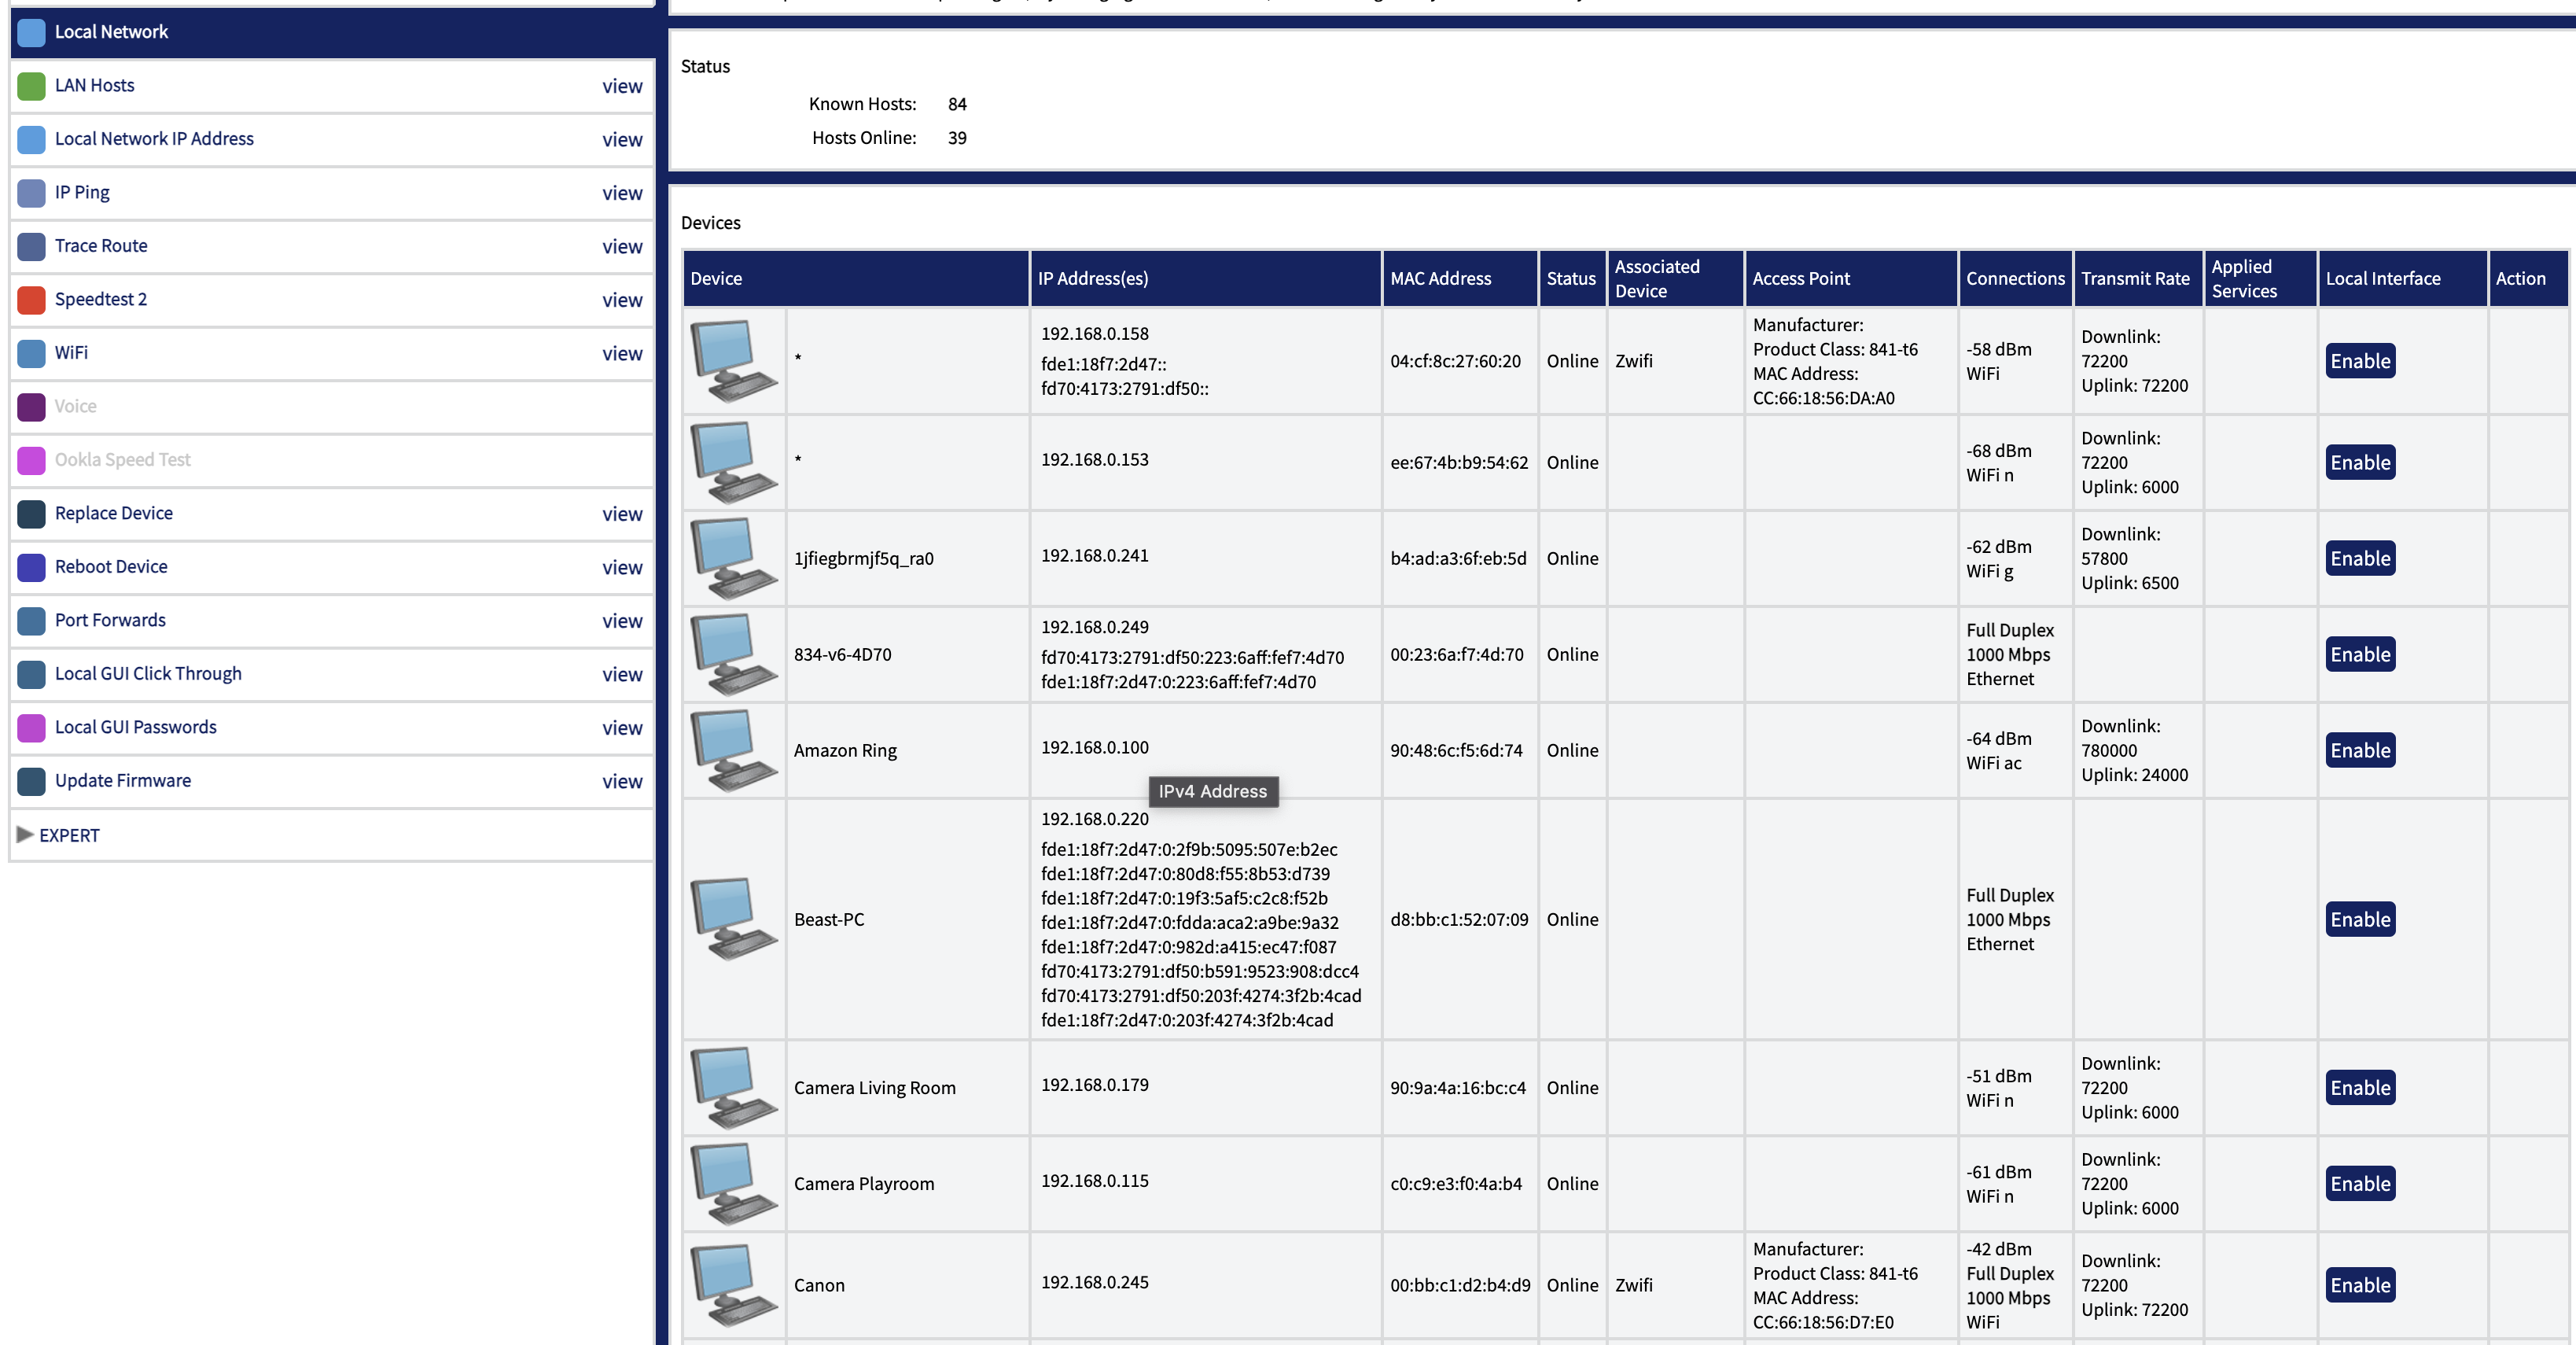
The information displayed in the Local Network window can be useful for troubleshooting. For example, if a subscriber is running an unsecured wireless network, there might be unauthorized users who are impacting service. You can see device IP and MAC addresses, device status, connection type, duplex mode, current bit rate and any applied services.
If the device is wireless, the Connections column shows the type of WiFi (b, g, or n) and a graph indicating the signal strength. If the device supports it, you can enable a local interface. You can also delete offline devices. For more information about working with services for specific devices, see Managing Services.
Naming a LAN Device
To name or rename a device:
- In the Local Network window, select the icon in the Device column.
- Type a name for the device.
- Select an icon for the device (optional).
- Select OK.
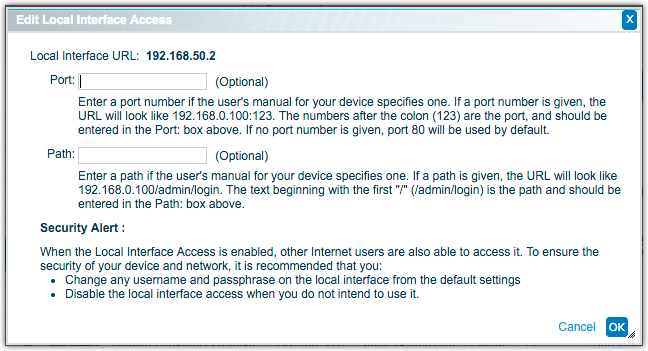
Enabling Local Interface Access
Some devices support a browser-based local interface for configuration. Review the documentation for the device to determine the port number or path needed to access the device.
To enable local interface access:
- In the Local Network window, select Enable in the Local Interface column.
- If applicable, enter the port number or path then, select OK.
- Save the changes to see the new link.
- To disable local interface access, select Disable in the Local Interface column.
Deleting a LAN Device
You can delete devices from this view to help un-clutter the list from devices that are no longer relevant. i.e. A friend came by and connected to your network only briefly or a device which was once on your network but you no longer own or intend to use again. Deleting a device from this view does not prevent the device from connecting to your network again in the future, should the need arise. Note that subscribers can also perform this function via their Control Panel.
To delete a LAN device:
- In the Local Network window > Action column, select Delete for the device that you want to delete.
- In the confirmation dialog box, select Delete.
The Delete option is available only for devices that are offline.